Showing posts with label crafts. Show all posts

Monday, September 22, 2014

Giveaway! Beaded Bracelets: 25 Dazzling Handcrafted Projects

Yay for giveaways!

We were recently gifted a few copies of brand new beading craft book, Beaded Bracelets: 25 Dazzling Handcrafted Projects by Claudine McCormack Jalajas (Running Press, publishers of our good friend Blair's book, Wisecraft). We love to foster creativity of all kinds and in celebration of Claudine's new book, we would like to give a book and beading kit away to one lucky reader! We got to sneak a glimpse at the book, and our favorite project is most definitely the Aegis of Athena (pg 109)!

One reader will receive a copy of the book and bracelet making kit on the right!

A bit about the book: Beaded Bracelets is a jewelry crafter’s guide to 25 original beaded bracelet designs that are contemporary, beautiful, and can be worn comfortably. Fully illustrated with both technical diagrams and photos, the fresh and alluring designs will appeal to both novice and expert crafters.

What you'll receive in the kit
• Thread & needle
• 3mm bugle beads, matte transparent
• cobalt aurora borealis (AB)
• 11/0 Toho round seed beads
• wisteria-lined crystal
• 5mm x 6mm baby bell Czech glass
• flowers
• 14mm x 10mm two-strand tube
• slide clasp


To enter the giveaway for a copy of the book and beading kit, simply leave a comment below with your name and email and we will choose a recipient on Wednesday the 24th of September. Thanks so much to Claudine and Running Press!

----
 Update: This giveaway is now closed, congratulations, Lisette!

Tuesday, May 28, 2013

An Evening with Madewell

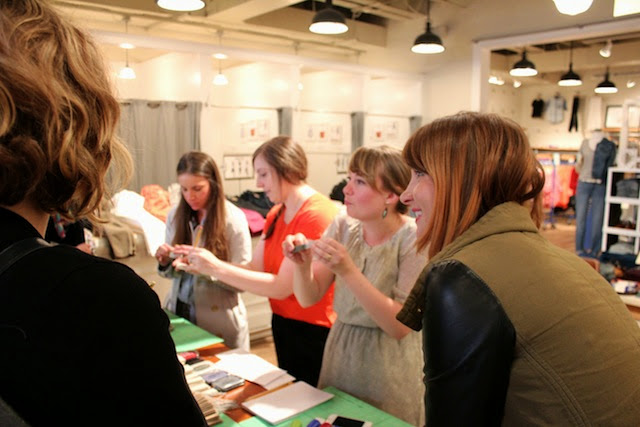
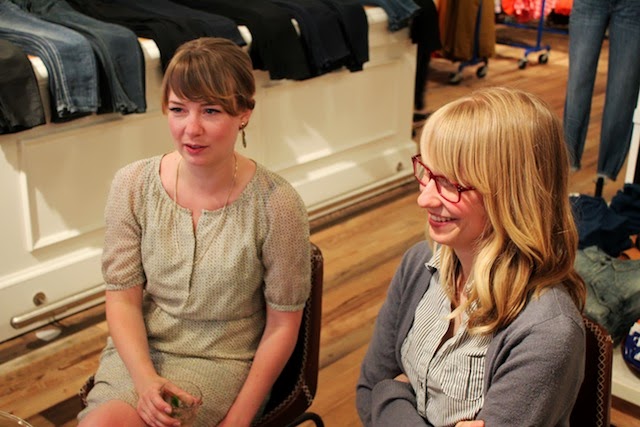
Hanging out with Madewell on Thursday for our Assemble + Madewell = BFF party, was one of the most fun nights in Assemble history, and we're so happy that so many of you came out to make stamps with us! The stamps were a hit, with stripey shirt, chevron or arrow template options! We made cute little gift tags for tying on sweet Madewell gifties. Mint-citrusy punch, tiny donuts and oh-so-much-shopping was had. If you didn't get a chance to stop by and see us, here's a sampling of photos below to enjoy. Thank you, Madewell and Assemblers!!

assemble and madewell crafting and shopping night make your own stamps
Some snaps from our Instagram

assemble and madewell crafting and shopping night make your own stamps

Photos by Christian Powers

Monday, February 18, 2013

Quickie Stamp Tutorial: Masking with Yellow Owl Workshop Stamps

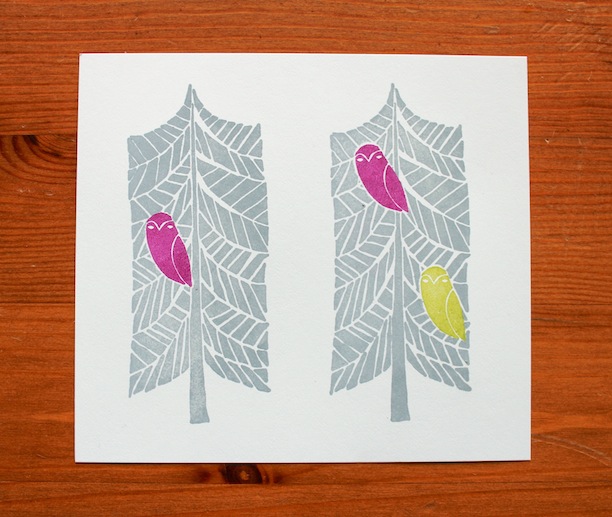
masking rubber stamps tutorial with yellow owl workshop stamps

Have you ever seen a stamped image like the one above and thought, how the heck did they do that? It's a simple stamping technique that comes in super-handy: masking. See below for easy instructions!

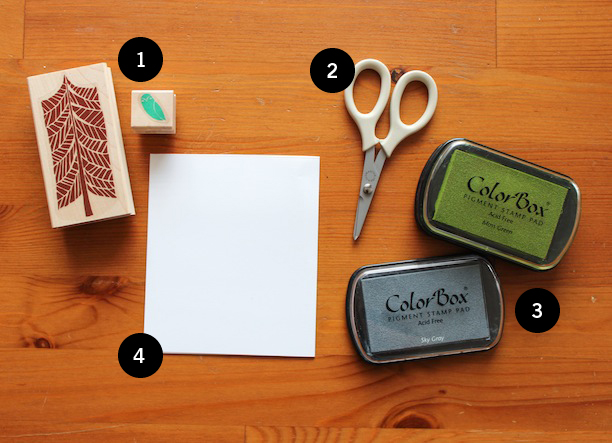
You will need:
1. Stamps! I used Yellow Owl Workshop's Owl & Tree set, $13.
2. Crafting or precision scissors. Mine are from Martha Stewart's crafting line.
3. Ink pads! I used a few Colorbox pigments--Peony, Moss Green and Sky Grey (available at most craft stores).
4. A surface to stamp on, some scratch paper and some thin paper such as a post-it. I used some bright white Mohawk paper for all of the above.

masking rubber stamps tutorial with yellow owl workshop stamps

To begin, ink your owl stamp and press it a few times on your scrap paper to get it good and ready. I've found that stamp impressions always look the best after a few impressions and ink saturations. Once you've done this a few times, ink the stamp and press it onto your post-it or thin paper. The post-it works well if you don't have the steadiest hand, because you can utilize the glue on the back of the post-it.

masking rubber stamps tutorial with yellow owl workshop stamps

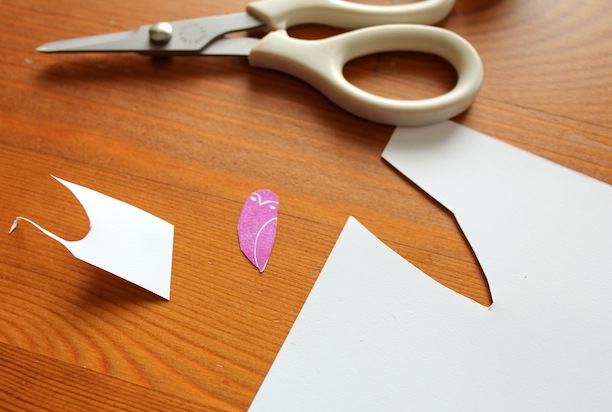
Get a really good impression and wait for it to dry. Then cut around the impression, staying just inside the lines.

masking rubber stamps tutorial with yellow owl workshop stamps

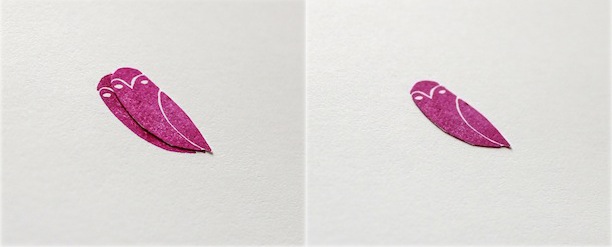
When you have a good cut-out or "die-cut," stamp another impression of your owl onto whatever you would like to use as your finished piece (a card, a piece of stationery, etc.) Get a good impression and then lay your cut-out (the mask in masking!) you just made over the impression. This is where the post-it glue comes in handy, as the glue keeps it in place. Get it completely lined up with the final impression.

masking rubber stamps tutorial with yellow owl workshop stamps

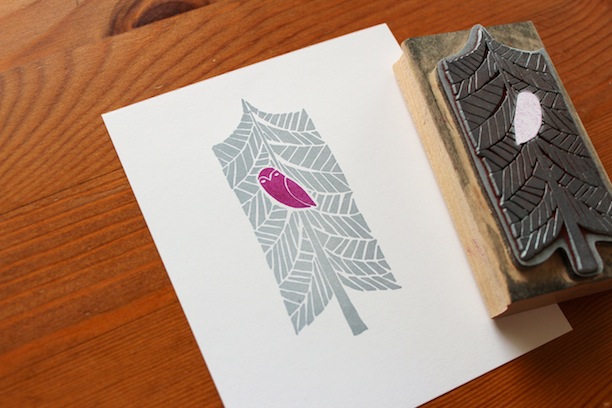
Repeat the inking and impressing process to get your tree stamp ready for the finished product. When it is inked evenly, gently place it over your masked owl and press down firmly. Try not to move the stamp, but make sure you press evenly, especially around where the owl is. Then, lift the tree off of the page.

masking rubber stamps tutorial with yellow owl workshop stamps

Perfect! Your owl is now sitting in the tree. Use Windex and a paper towel or a baby wipe to clean your stamp (or if you're fancy-pants, use real stamp cleaner!) and repeat.

I love this technique, you use do it for many types of projects and can create whole scenes with different colors by using the masking technique. Good luck!

Tuesday, December 11, 2012

Crafty Project: In-the-Round Crocheted Ornaments

We've got a great DIY for holiday activities (or just for yourself!): crocheted ornaments. This is an easy way to use up scrap yarn and adorn your tree, top a gift, or deck the halls!

*A note about the project
This is an intermediate level crochet project, so the directions below do not include our basic tutorial. But for all you beginning crocheters, Assemble will be launching our Crocheted Granny Square Kit THIS FRIDAY, which includes full directions, diagrams and all materials. These ornaments are a modified version of our granny square pattern!

how to make crocheted granny square round ornaments crochet

Materials
1. 3.5 mm crochet hook
2. Baby or sport weight yarn in several colors
+ Scissors

how to make crocheted granny square round ornaments crochet

ROUND ONE
Start with a loose slip knot.
Chain 5.
Connect last chain to slip stitch to create a circle.
Chain 4.
Double Crochet through the center of the circle, then Chain 1.
Repeat DC, CH1 for a total of 12 spokes through the center of the circle.
Complete round by connecting yarn to the first spoke, in the third chain up, with a slip stitch.

ROUND TWO
In the chain space between the first two round one spokes, add a new color with a slip stitch. Chain 3 (counts as a DC) and then Double Crochet. Chain 1.
In the next space between spokes, DC twice then Chain 1.
Repeat DC2, then CH1 between all 12 spokes of round one.
Complete round by connecting yarn to the first spoke, in the third chain up, with a slip stitch. Cut yarn, leaving a 3" tail and tighten.

how to make diy crocheted granny square round ornaments crochet

ROUND THREE
In the chain space between DCs of round two, add a new color with a slip stitch. Chain 3 (counts as a DC) then Double Crochet. Chain 2.
In the next space between sets of DCs, DC2 then CH2.
Repeat DC2, then CH2 between all 12 sets of round two.
Complete round by connecting yarn to the first spoke, in the third chain up, with a slip stitch. Cut yarn, leaving a 3" tail and tighten.

ROUND FOUR - Scallop
In the double chain space between sets of DCs of round three, add a new color with a slip stitch. Chain 3 (counts as a DC) then DC3 in the same space for a total of 4 double crochets.
Single crochet in the middle of the next set of DCs.
DC4 in the next double chain space.
SC inbetween the next set of DCs from round three.
Repeat until scallop is complete, and connect where you began. Cut yarn, leaving a 3" tail and tighten.

ADD CHAIN LOOP
Chain 8 to 12 chains out from the perimeter of the ornament.
Connect back to the piece with a slip stitch.

FINISHING
Weave the tail ends into like colors from the back using your crochet hook. Cut remaining tail close to the piece. Voila!
how to make diy crocheted granny square round ornaments crochet

Option
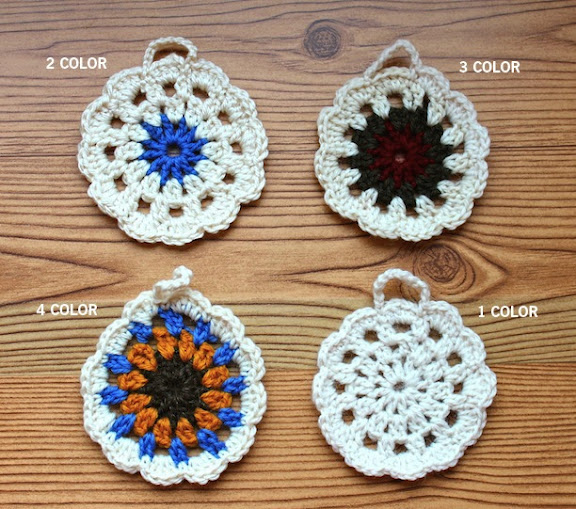
You can choose to change colors for each round, or make a series with only a few color switches. The pattern also looks great with a single color, too!

Thursday, November 1, 2012

Crafty Thursday: DIY Wine Cork Stamps and Patterns on Chipboard

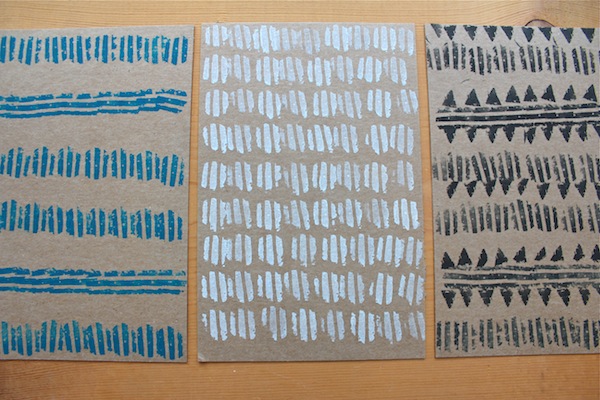
It is incredibly easy (and cheap!) to turn a wine cork into a simple stamp. Reminiscent of block-printing, it's super easy to use these stamps to create lots of fun projects! Today's craft: rows of lines and triangles on chipboard.

block printing style stamping using wine corks on chipboard stationery coasters bookmarks gift tags DIY

Here's what you'll need:
• Two wine corks
• Exacto knife and scissors
• Pencil
Ink pad(s)
• Sheets of chipboard
• Scrap paper to test out your designs

block printing style stamping using wine corks on chipboard stationery coasters bookmarks gift tags DIY

Here's what to do:
Draw a simple outline of a triangle on the flat side of the wine cork (if the cork isn't completely flat, you can slice a sliver off the bottom to even it out.) Draw some parallel lines on the other.
Carefully carve around the drawn outlines, removing cork in little bits as you go. Test out the image as you carve, and make adjustments as you go.
Once you're happy with your images, play around with inks and patterns on some scrap paper. Then stamp! stamp! stamp! onto sheets of chipboard.

block printing style stamping using wine corks on chipboard stationery coasters bookmarks gift tags DIY

Notes:
--It's easier to stamp up bigger sheets and then cut it into different shapes, than to work with smaller pieces. It keeps the rhythm of the pattern more consistent and you don't have to worry about edges.
--Cork has lots of natural inconsistencies, so your stamps won't be as pristine as rubber or linoleum. But that is part of it's charm, no?

Sheets stamped. Now what??
Coaster set!
Bookmarks!
Gift tags!
Stationery!
Take a look at what we came up with:

block printing style stamping using wine corks on chipboard stationery coasters bookmarks gift tags DIY
Make a bookmark for your DIY book with a simple piece of yarn.

block printing style stamping using wine corks on chipboard stationery coasters bookmarks gift tags DIY
Coasters for your carrot juice!

block printing style stamping using wine corks on chipboard stationery coasters bookmarks gift tags DIY
Type a note on your brand, new stationery.

Have fun! And let us see your finished pieces!


Monday, October 22, 2012

DIY Autumn Craft: Needle Felted Acorns

Happy Monday!

We're a little bit obsessed with these tiny little acorns made of felt. They are simple to make and a little cup of them or scattered around a fall table is just so cute!

how to make a needle felted acorn with geometric tray by piano nobile and white pumpkins autumn halloween thanksgiving decor
Acorns by Assemble, tray by Piano Nobile, $40


We wanted to start our crafting video series (more coming soon!) with How To Make a Needle Felted Acorn. This was so fun to make, we hope you enjoy and share! Happy Autumn!

How To Make a Needle Felted Acorn from Assemble Shop and Studio on Vimeo.


Monday, September 24, 2012

Behind the Scenes: Busy Bees are Working!

Okay, not actual bees, but Emily and I have been busy, busy working on some brand new, fantastic products for Assemble. Debuting soon, are several crafting kits that we have been developing to keep you crafting.
crafting kits needle felting bookbinding crochet
The first kits we will be debuting include needle-felting, bookbinding and crochet. Plus, more are coming! We are always looking for great ideas for products, especially kits. What would you like to see? Fabric projects? Stamping kits? You name it, we'd love to hear your ideas. In the meantime, here's a little sneak peek of what we've been working on. Sorry it's such a tease, but there is more to come soon!

Blogging tips