Showing posts with label craft projects. Show all posts
Wednesday, July 23, 2014
Crafty Project: Happy Cloud Felt Wall Mobile
I asked my husband what I should all this mobile project post, and he answered, "Cloudy with a Chance of Baby." Perfect! We've got a little one on the way this December, and after finding (and buying!) a few mobiles, I was never satisfied with any of them. Those awesome geometric mobiles? Yeah, they don't stay together. And even the cutest over-the-crib mobiles seem like they will get in the way with such a small crib. (We're using a mini). So, I went ahead and decided to make a wall mobile myself! See below for instructions for your own Happy Cloud Felt Wall Mobile.
You will need:
• about 1/3 yard of felt for your cloud
• several smaller sheets of felt in whatever colors you'd like for your droplets--one per color (don't forget to include black for your cloud's face)
• invisible thread or fishing line
• poly-fil or stuffing material
• scissors
• a needle
• pins
• a sewing machine
Cut out your cloud shape, depending on the size of the wall space you'll be hanging. Mine is roughly 21"wide x 14" high.
Cut out your little face for your cloud. I went with simple happy, but we had a lot of fun testing all sorts of smiley/frowny shapes.
Pin the face where you'd like it to stay, then stitch on your sewing machine or by hand with black thread to keep in place.
After your face is completely stitched, pin the cloud onto another piece of the same color felt. This will be the back of your fluffy cloud. Stitch carefully around all of the curves of the cloud with your sewing machine. Remember to leave enough space unstitched to fill the cloud with stuffing.
After sewing your cloud to it's backing (and left it's stuffing hole), cut completely flush around the cloud's curves for an even finish. Tip: around the stuffing hole, I like to leave a little extra for stitching, just in case the stuffing affects the amount you have to work with.
Stuff your cloud using poly-fil or a similar stuffing material. Don't over-fill your cloud. You'll want this to be a loose stuffing.
To make your droplets, create a template that you can use on each color to cut around. Mine was roughly 2" x 4". Cut each felt sheet in half. Place one half to the side for the backing of the droplet. I got about 5-6 droplets out of each half sheet.
Finish cutting all of your droplets. You will most likely have a lot more than you will use on your mobile, but it's always best to be prepared, especially if you want a very rainy cloud!
Pin all of your droplet's to the other half of the felted sheet that you set aside. Around 5-6 should fit comfortably with enough space for stitching.
Using the sewing machine, stitch all the way around each of the droplets. You can also use this time to stuff them with poly-fil if you'd like a puffier droplet, but I simply sewed them to a backing to add depth.
After sewing all of your droplets, cut flush around the edges of each droplet.
To tie your droplets together, cut a long piece of invisible thread, and knot the end. Thread this length into a needle and stitch into the pointy tip of a droplet. Pull the thread all the way out until the knot catches. Tie a knot at the top of that droplet to keep in place. Then with the same thread, thread a new droplet tip, and pull the thread all the way through until you are satisfied with the space between the droplets. Knot the thread at the tip to keep the second droplet in place. Continue this process until you have about four droplets on each thread (or however many you'd like). Then, stitch the end of the threaded/knotted droplets through the bottom of the cloud and tie a knot. Cut off any excess.
Repeat this process until you are satisfied with the amount of droplet strings you have hanging from your cloud.
To hang, simply thread a piece of invisible thread several times through the top point of the cloud and tie to a nail or hook next to the crib or changing table. Make sure it's tied super tight (I even put some tape on the thread over the hook). You don't want it falling onto your baby!
And there you have it! Enjoy!
Tuesday, October 29, 2013
Assemble Rubber Stamp Project #2: DIY Wrapping Paper
It's been a bit since our Assemble Rubber Stamp Project #1, and with the holidays coming, we thought we'd do a quick tutorial on DIY wrapping paper with our dashing polar bear stamp. We wrapped this package with DIY wrapping paper made from regular old printer office paper, junk mail (yes!) and our stamp.
To create this package, you will need:
• blank sheets of paper (we used office paper and a Tiffany & Co. envelope)
• a stamp
• ink pad
• your box!
• double-sided tape
• scissors
• baker's twine or ribbon
Stamp your image onto the paper in whatever design you prefer. I stamped this paper a few days before hand because the coating on the printer paper was a bit slick, and the ink needed to dry.
If you need to seam pieces of paper together to be big enough to fit your box, flip the page over and place double-sided tape as close to the edge as possible.
Connect with the other sheet, and remember to use this "seam" as one of the box's corners (see photo below).
Fold your page over, find the edge of the box and either cut or fold your paper to size. Place double sided tape to the very edge of that fold or cut and tape to the other side of the paper (which should be folded in underneath).
Push the end flap down and create a seam. Fold the side flaps into perfect triangles and place double-sided tape to the edges of these folds (see pic below, you can just make out the tape).
Tape the two side folds in and secure. Place double-sided tape along the triangular edges of the last flap, and fold in toward the center. Secure in place. Repeat these steps on the other side.
To create your gift tag, stamp on a different colored cardstock and cut close in a rectangular shape. Tie baker's twine around the package and slip the card under the top bow. Done and done! A perfect package for pennies.
To create this package, you will need:
• blank sheets of paper (we used office paper and a Tiffany & Co. envelope)
• a stamp
• ink pad
• your box!
• double-sided tape
• scissors
• baker's twine or ribbon
Stamp your image onto the paper in whatever design you prefer. I stamped this paper a few days before hand because the coating on the printer paper was a bit slick, and the ink needed to dry.
If you need to seam pieces of paper together to be big enough to fit your box, flip the page over and place double-sided tape as close to the edge as possible.
Connect with the other sheet, and remember to use this "seam" as one of the box's corners (see photo below).
Fold your page over, find the edge of the box and either cut or fold your paper to size. Place double sided tape to the very edge of that fold or cut and tape to the other side of the paper (which should be folded in underneath).
Push the end flap down and create a seam. Fold the side flaps into perfect triangles and place double-sided tape to the edges of these folds (see pic below, you can just make out the tape).
Tape the two side folds in and secure. Place double-sided tape along the triangular edges of the last flap, and fold in toward the center. Secure in place. Repeat these steps on the other side.
To create your gift tag, stamp on a different colored cardstock and cut close in a rectangular shape. Tie baker's twine around the package and slip the card under the top bow. Done and done! A perfect package for pennies.
Tuesday, October 8, 2013
Crafty Project: White Bean Lokta Tea Tin
Yes, we have been really crummy about updating this blog--but not for lack of ideas and love! Assemble is working on some great new projects that we will hopefully be able to announce soon. In the meantime, we are only posting to this blog when we have something lovely that comes from the heart. Here's one today! We are part of the Republic of Tea's mailing list, which means we get a loose tea bag in our catalog every month. They are amazing! However--there's nowhere to put them. So, I decided to use an old Trader Joes tea tin and make a new, special spot just for the loose bags. Enjoy!
For this project, you will need:
• An old tea tin that you would like to cover
• Decorative paper. I used White Bean Lokta from Paper Source. See the Orange Bean version in our hardcover bookbinding kit! Now available on Etsy.
• A straight-edged ruler.
• A pen knife.
• Binder's glue or mod podge--I used PVA.
• A glue or sponge brush.
• A cutting mat.
First, measure the sides of your tin and transfer the measurements onto the paper. You can either use a pencil to draw a line to cut or just use the pen knife and straight edge. Make sure that you like the design on the reverse side of the paper. If you have a large pattern like mine, make sure that it is aligned as you wish.
Cut your paper and line it up with the edges of the tea tin. Make sure that it fits inside of the tin's ridges.
Spread a small amount of your glue on the sides of the tin and press the paper evenly to remove any air bubbles. If your paper gets too wet, it can bubble, so only use a conservative amount.
Continue all the way around the tin. My lokta has a rough edge that is difficult to see after gluing, so I did not trim to the corners. If you want a perfect look, make sure to trim the paper as it reaches the last corner of the tin.
Measure your lid, and cut a square according to your measurements. You may have to trim the excess, but cut a large enough piece to cover the entire lid. Position the lid on top of the backside of the paper and cut small slits where the corners come to a point. These will help you wrap the lid nicely.
Spread a thin layer of glue on your lid and position it. Then, fold the corners in on the sides and glue the remaining pieces. Voila! All done! A tea tin for those rogue tea bags. Have a cuppa for us!
Friday, August 9, 2013
Simple Birthday Crafting: Nature-Patched Handkerchief for Dad
Jacqui and Scott Scoggin, the married couple who comprise Slide Sideways, have always been two of our very favorite people here at Assemble (plus their designs aren't too shabby either!). I picked these little patches up at their booth at Urban Craft Uprising last month, with plans to sew them onto a bandana for my dad on his birthday. A regular outdoorsman, my dad always seems to go out hunting or fishing, wearing a handkerchief around his neck. These little patches made me think of him.

Screen Printed Nature Patches by Slide Sideways, available in their online shop, $14After pre-washing the bandana, I used regular sewing pins to hold the patches in place, and merely stitched slowly around them with a standard needle in my sewing machine. Easy as cake! Plus oh-so-cute. I sewed three onto the handkerchief and left one floating for use on whatever he would like. Happy Birthday, Dad! We don't have these patches on our website, but you can definitely grab some from Slide Sideways on their website here.
Happy gathering!
Tuesday, May 28, 2013
An Evening with Madewell
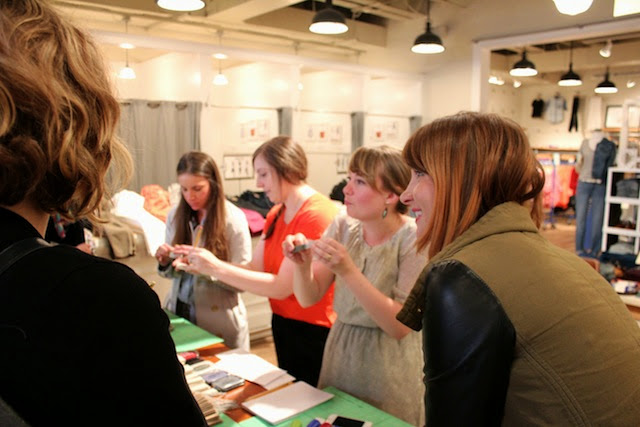
Hanging out with Madewell on Thursday for our Assemble + Madewell = BFF party, was one of the most fun nights in Assemble history, and we're so happy that so many of you came out to make stamps with us! The stamps were a hit, with stripey shirt, chevron or arrow template options! We made cute little gift tags for tying on sweet Madewell gifties. Mint-citrusy punch, tiny donuts and oh-so-much-shopping was had. If you didn't get a chance to stop by and see us, here's a sampling of photos below to enjoy. Thank you, Madewell and Assemblers!!


Some snaps from our Instagram


Photos by Christian Powers
Some snaps from our Instagram


Photos by Christian Powers
Subscribe to:
Posts (Atom)