Showing posts with label assemble crafts. Show all posts

Thursday, December 12, 2013

Crafty Project: Painted Holiday Globe Ornaments


I have to say that my tree is usually a bit less traditional than most. I love fake white trees, twinkly white lights and a non-traditional color scheme. That being said, I can never find glass, globe ornaments that I like because they are usually silver, gold, blue, red or green. And those colors are great--but sometimes, you just want to mix it up. So, we decided to do a fun (and very easy!) project for creating your own Christmas bulb ornaments in any color. Super inexpensive, quick and easy enough to do during a free hour. Weee!

Make your own hand-painted Christmas globe ornaments of any color

You will need:
• A package of inexpensive, plain glass bulb ornaments
• Acrylic craft paint in colors of your choice
• Dixie cups or several cut bottoms of old plastic bottles (for draining), small enough to hold the bulb
• A small amount of water if your paint is very thick
• Paper towels

Make your own hand-painted Christmas globe ornaments of any color

First thing's first: pop off the top of your ornament and place to the side. (You won't want to lose those!) Then, squirt a small amount of the paint of your choice into the bulb and proceed to roll it back and forth in your hand to cover the glass. You can always add more paint.


After coating the entire inside of the bulb, place it in your dixie cup or half-bottle container and allow the excess paint to drip out. I let these sit for about 6-8 hours. After they sit in the drip containers for a while, remove the ornaments and set them securely on a paper towel to continue drying. I would recommend overnight, if not longer.


Another fun thing to try is mixing colors. If you want a more brushed look, fill the ornament with both colors of paint at the same time, leaving each enough room to drip out. If you want a more modern, color-blocked look, wait for one color to dry, then add the other color. I used the aqua and gray brushed texture. Fun!


After the paint is dry, pop the metal top back on the ornaments and then insert the metal hook rungs. You always want to place the metal top on before inserting the hook, because the metal pieces rungs can scratch the paint on the inside of the ornament. And there you have it! Hang them on your tree or give them away as gifts!


Wednesday, August 28, 2013

Assemble Rubber Stamp Project #1: Make a Scene!

Got your stamps in the mail and not sure what to do with them? We are starting a mini-series of fun projects to make with our Assemble Rubber Stamp Sets! It's a lot of fun playing around with these after working so hard on them! If you haven't gotten your favorite set yet, head over to our shop to grab yourself some before they are sold out.

This little project involved cut paper, colored pencils, a black ink pad and stamps! Make cards, little scenes, dioramas, kids' projects (although I had fun making these and I don't even have kids!), etc. Have fun!

rubber stamping diorama scene or card project

rubber stamping diorama scene or card project

rubber stamping diorama scene or card project

rubber stamping diorama scene or card project

rubber stamping diorama scene or card project

Friday, August 2, 2013

New Seattle Stockist: Stitches

We're happy to announce that our Crochet Kits, Needle-Felting Kits and Stamp Sets are now available at Stitches in Seattle! If you want to see our product in person before buying--head on out to Capitol Hill to check them out. The Needle-Felting Kits are also available at Schmancy in Belltown! Yay for small businesses!

assemble kits at Stitches in Seattle


Wednesday, June 5, 2013

Star Gazing Blog Hop: DIY Constellation Coasters How-To

star gazing summer party blog hop how to make constellation coasters

Join the Star Gazing party and make a set of constellation coasters! Perfect for any summer night soiree.

star gazing summer party blog hop how to make constellation coasters

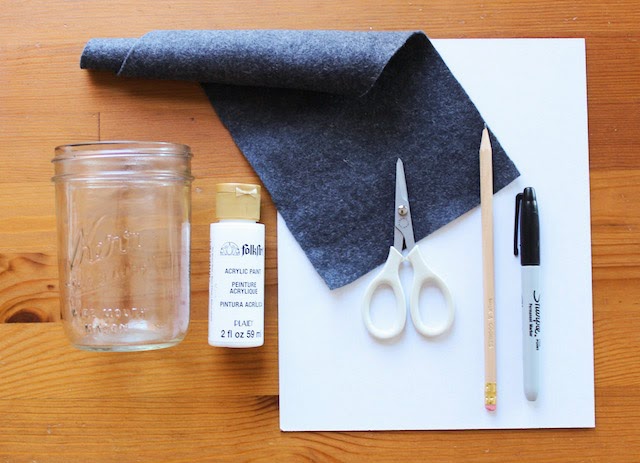
Here's what you'll need:
• Wool felt
• Jar or 4" circle template
• Scissors
• Sharpie
• Acrylic paint
• Pencil with eraser
• Self-adhesive mounting board (We used this.)

star gazing summer party blog hop how to make constellation coasters

Trace the jar lid onto your felt with a sharpie. Cut out as many rounds as you'd like.

star gazing summer party blog hop how to make constellation coasters

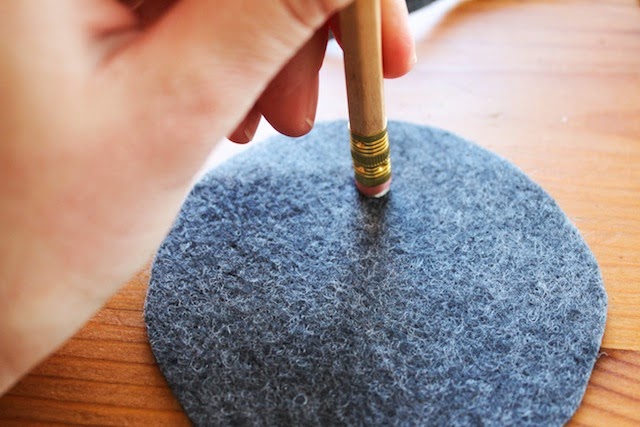
Dip the pencil eraser into acrylic paint and do a few test dabs on scrap felt first.
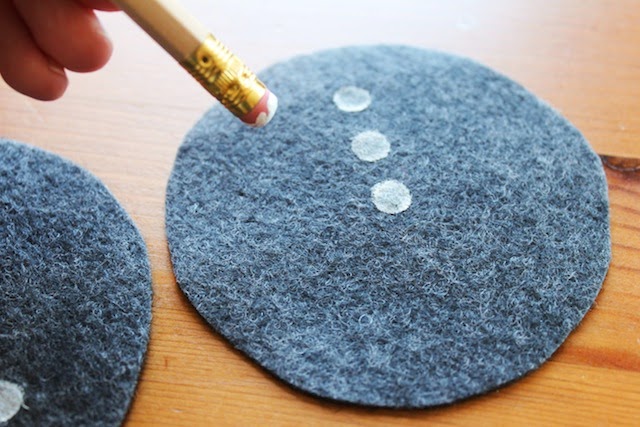
Following this simple constellation cheat sheet, dot your felt rounds and let dry.

star gazing summer party blog hop how to make constellation coasters

To stabilize your coasters, trace the same jar onto the self-adhesive board and affix to the back of the felt.

Give each guest their own starry pattern or zodiac sign. Make a
set for the hostess or a set as a housewarming gift. Once you start dotting, it's hard to stop!


See the other party crafts and treats for the day!
Tissue Lanterns - Confetti Sunshine
Mason Jar Drinks - Kate Landers Events
Star Food Picks - My Paper Pinwheel
Star Rice Crispies - Lulu the Baker

And a thank you to our lovely sponsors:
• (Our favorite pals) Trophy Cupcakes
Splendid Sweet Shoppe
Vintage Ambiance

Photos via Assemble & Confetti Sunshine

Tuesday, May 21, 2013

Crafty Project: Linoleum Block Stamps

We're getting all ready for our Madewell event this coming Thursday, where we will be making custom linoleum block stamps (+ shopping + snacking!) While we were making up some super-secret samples for Thursday, we decided to make another quick one to show you what we're going to be doing on Thursday with Madewell.

how to make a linoleum block stamp tutorial

In honor of my nephew (being born on Thursday!), we made a little dinosaur stamps. He's a fan of dinosaurs...we've decided..? Check out the steps below and get ready for Thursday!

how to make a linoleum block stamp tutorial

You will need:
• ink or pigment
• a linoleum block
• a linoleum carving tool
• an image of your choice
• pencil
• tape
• paper to print on

how to make a linoleum block stamp tutorial
Print or draw your image on a piece of regular or tracing paper. Make sure to draw all text backwards. Flip the image over, and color (especially over lines) with your pencil.
how to make a linoleum block stamp tutorial
Turn the image back right side up, and tape to the linoleum block. Use a toothpick or a sharp pencil (careful not to tear through the paper) and trace your image.
how to make a linoleum block stamp tutorial
Peel the image off of the linoleum block. You should have a result something like the above.
how to make a linoleum block stamp tutorial
Begin gently carving around the edges of your image. Outline the entire image before deep carving. A light touch will help with small details.
how to make a linoleum block stamp tutorial
When your outline is complete, begin carving away the negative space on the stamp. Get rid of anything that you don't want to see in your imprint with your carving tool.
how to make a linoleum block stamp tutorial
When you think you are close to being complete, ink up your image and note which pieces of negative space are also inked. Continue to carve until only the image you want to imprint is inked. Then, make a few practice impressions and adjust your block with the carving tool until it is to your liking. And there you have it! Your very own stamp!
how to make a linoleum block stamp tutorial

Blogging tips